
Reducing material volume is a necessity in additive manufacturing. Using excess material in your part is a waste and can be costly no matter what your printing method looks like. This material reduction process could be termed as “lightweighting” but many people are more familiar with the concept of creating “infill.” Nomenclature is a little unclear here but we’re talking about the same thing. A typical infill is a low material-density pattern that replaces solid […]
3D Printing / Mechanical Design / Projects
Posted on:
Printing Flexible Parts
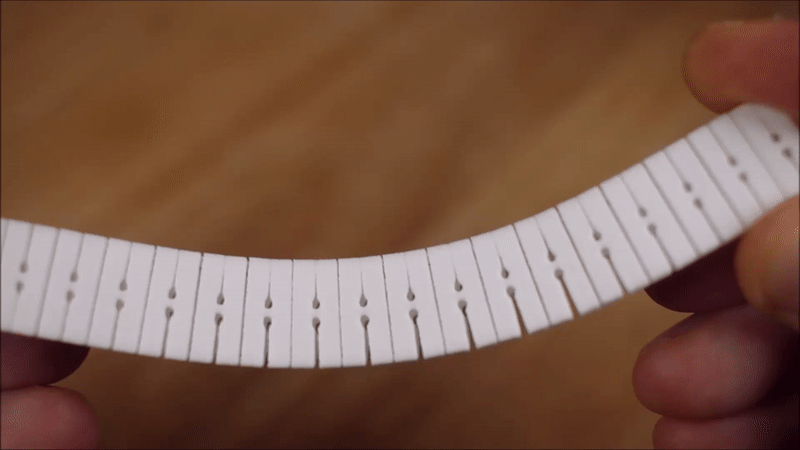
SLS prints can be very flexible. The key is designing features that will allow the typical Nylon PA 12 material to flex where needed. 3D printing makes it very easy to pattern small intricate flexure features across a part. Each individual flexure only needs to bend a tiny amount to contribute to a larger overall bending across a part. The part is SLS printed in a static unflexed state and is immediately flexible when removed […]

3D Printing / Projects / Software / Solidworks
Posted on:
Importing Lattice Type Geometry into Solidworks
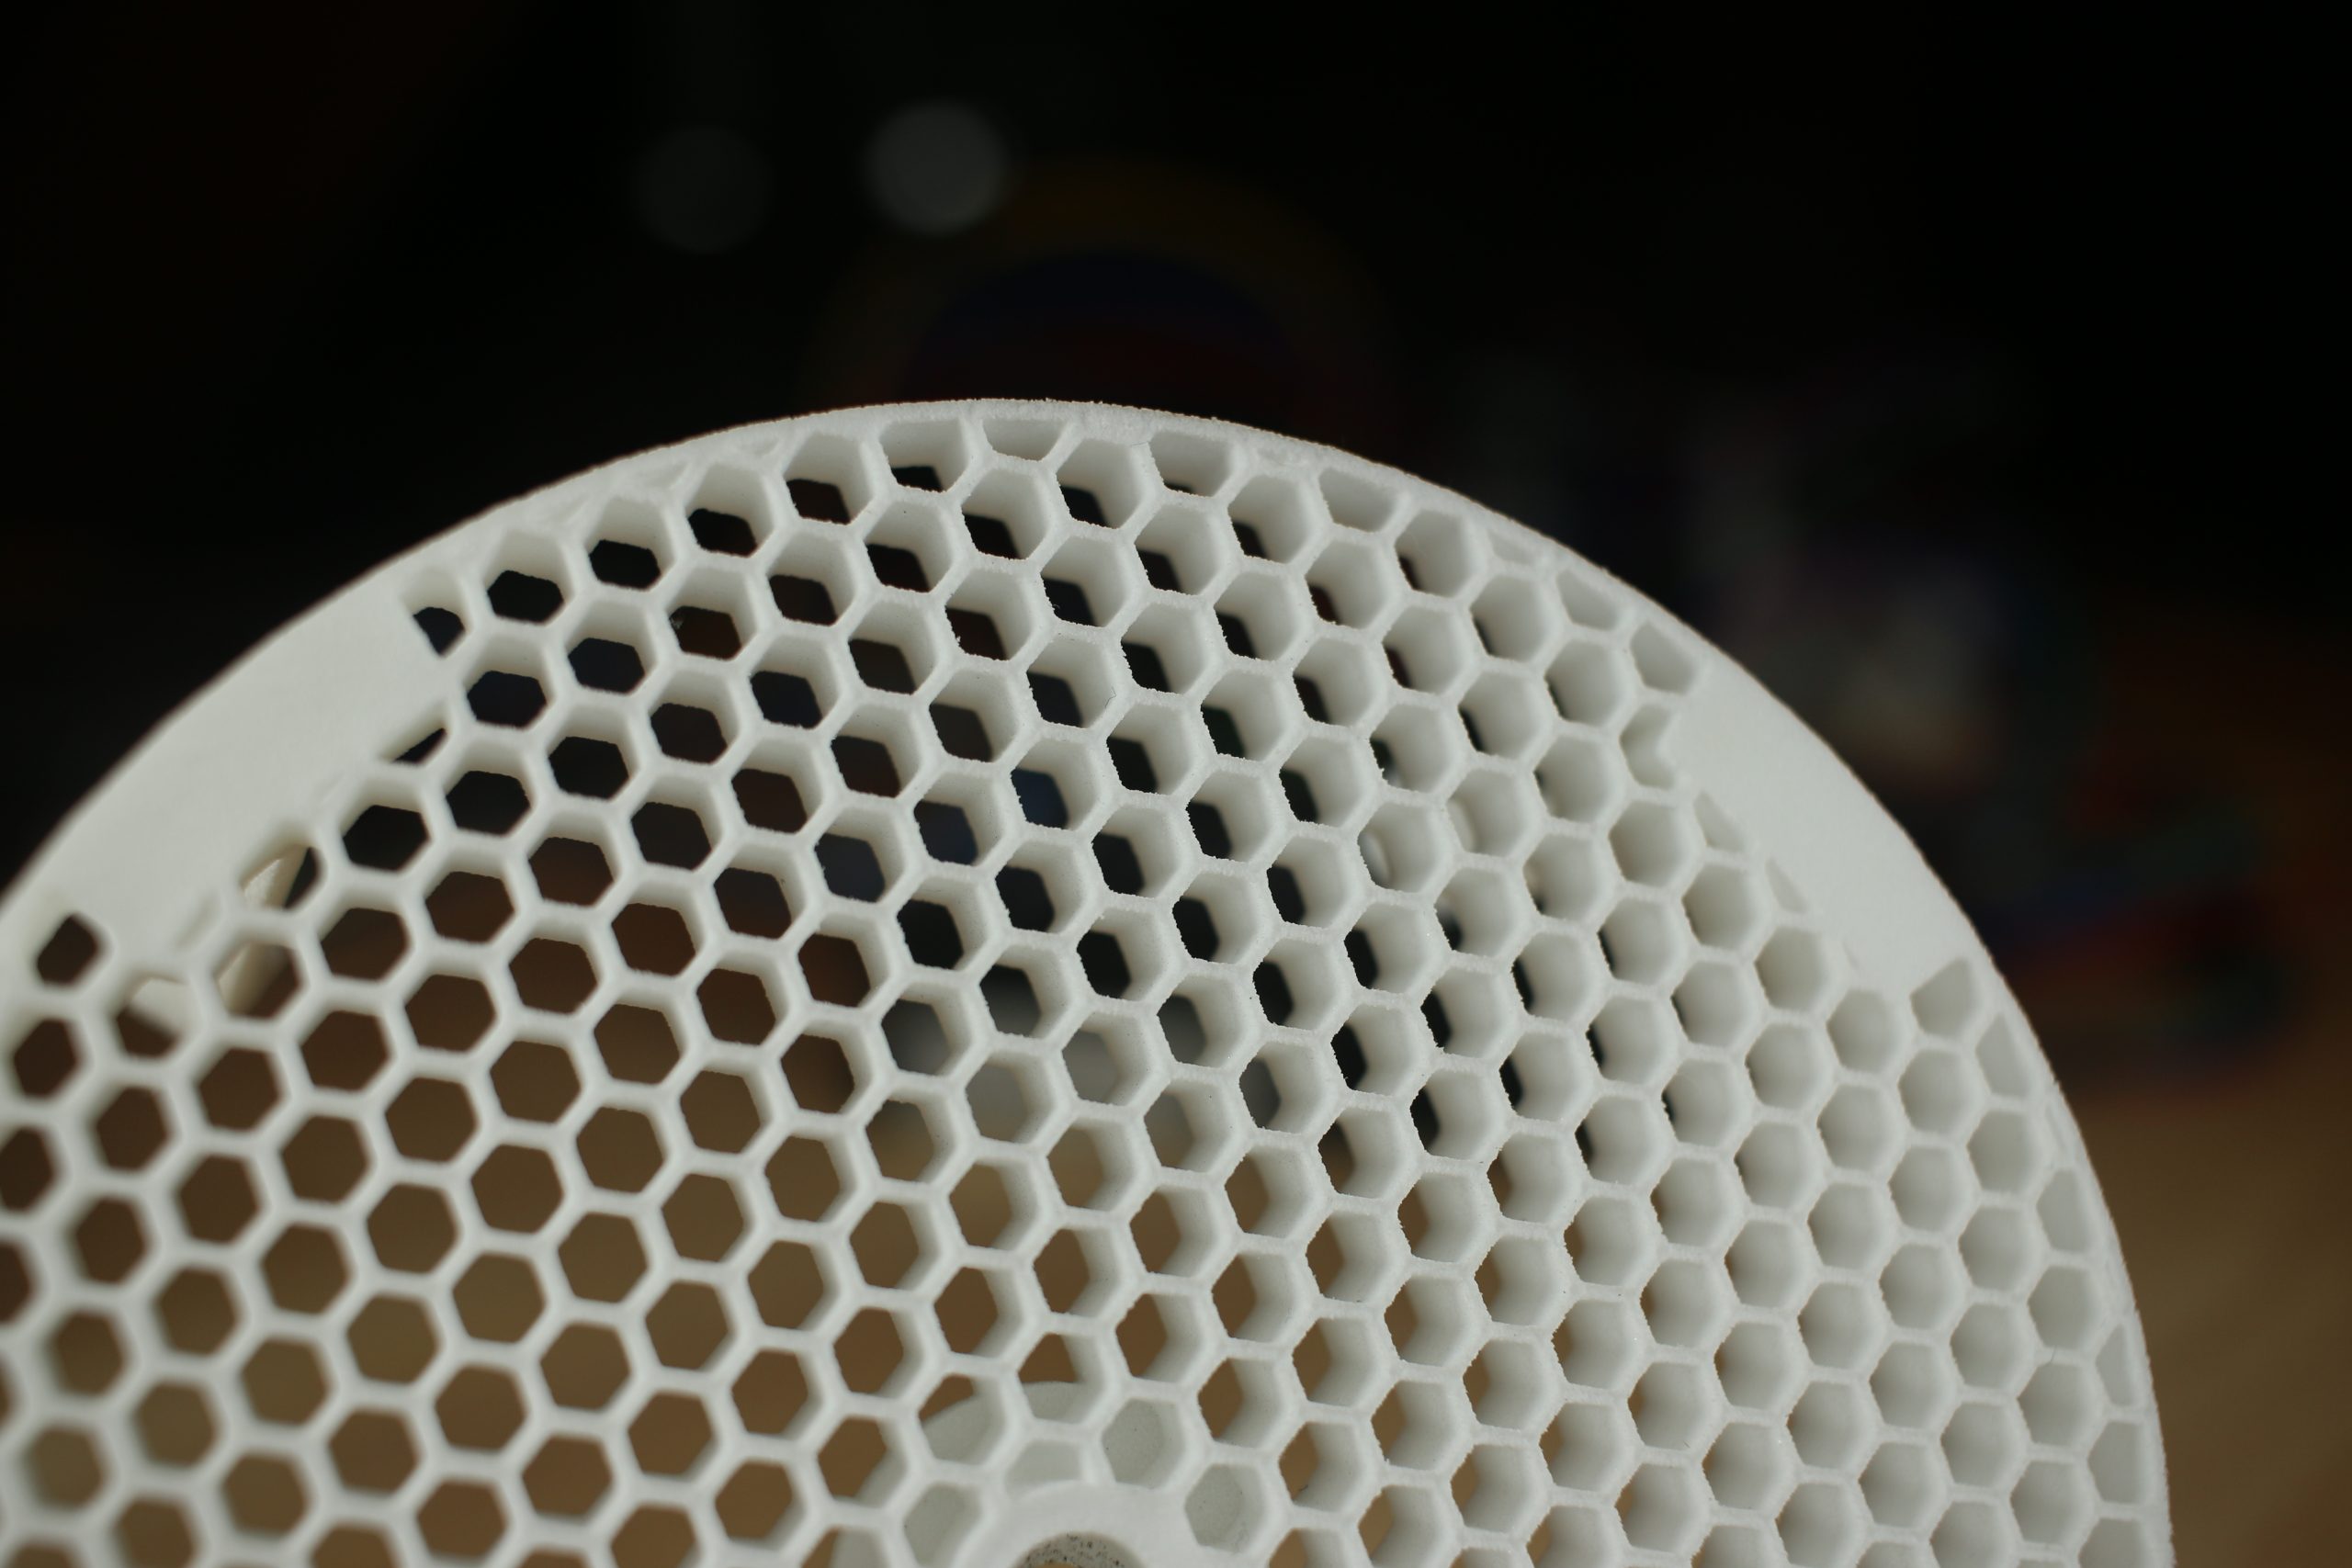
I’ve been daydreaming about some 3D printing projects again and have spent some time looking at the lattice style structures that are used as low density volume fillers in SLA or SLS prints. I think this is an underappreciated area of printing because these structures can only be created practically by printing and there is likely some interesting strength and stiffness optimizations you can do by tinkering with the lattice geometry. I think this will […]
3D Printing / Mechanical Design / Projects
Posted on:
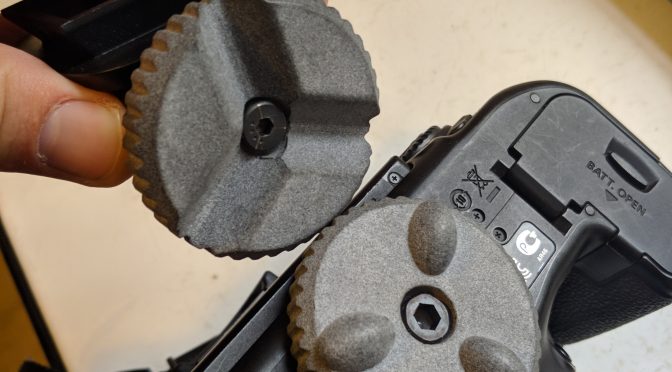
Magnetic Camera Mount
I’ve been looking to dip my toes into the 3D printing pool for a week or so now. I really needed a project that would be a good excuse to print some parts. I decided to start with the design of a magnetically fastened camera mount that would use a Maxwell kinematic coupling. I love kinematic couplings and used them in some cool automation applications in the past. They’re a great way to repeatably and […]