
This 3D scanner project is built around a second-hand Baumer OADM SA35 laser displacement sensor. This type of sensor seems to be relatively unknown in the hobbyist maker space and I’m not sure if it’s due to obscurity or the high upfront cost (hundreds of dollars). These sensors have high accuracy, rapid response times, and operate without physical contact. They typically employ a triangulation-based method, utilizing a laser and a sensor to measure the position of the reflected beam. Lower end sensors can be found surplus on eBay for under $100, likely scavenged from scrapped automation equipment.
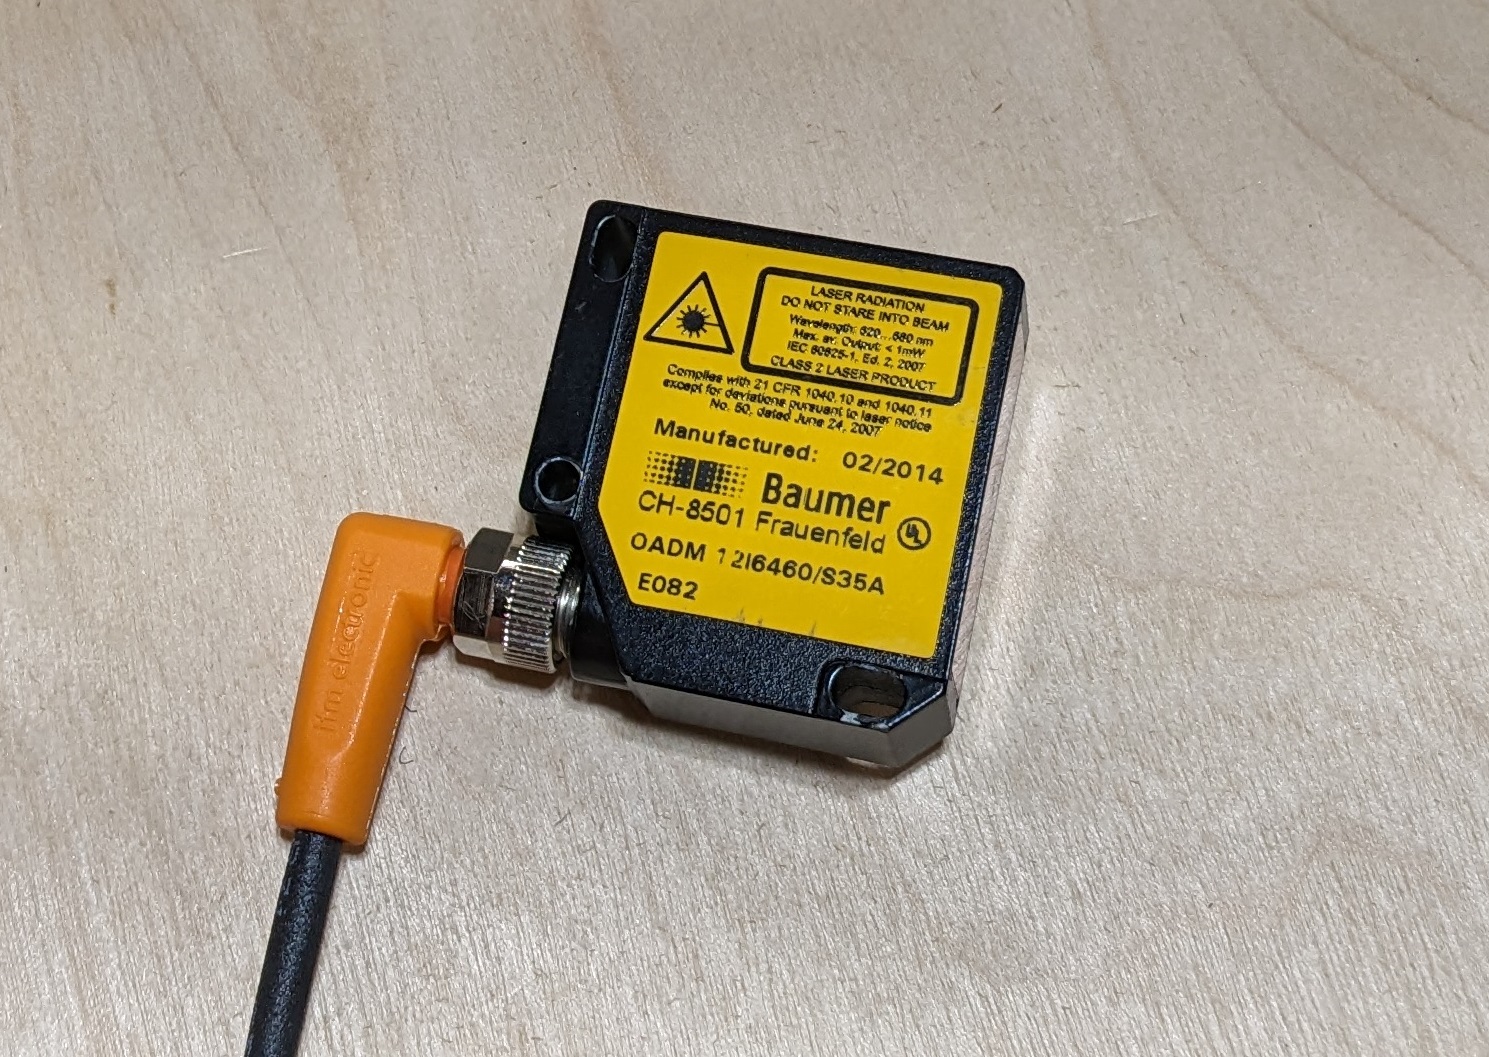
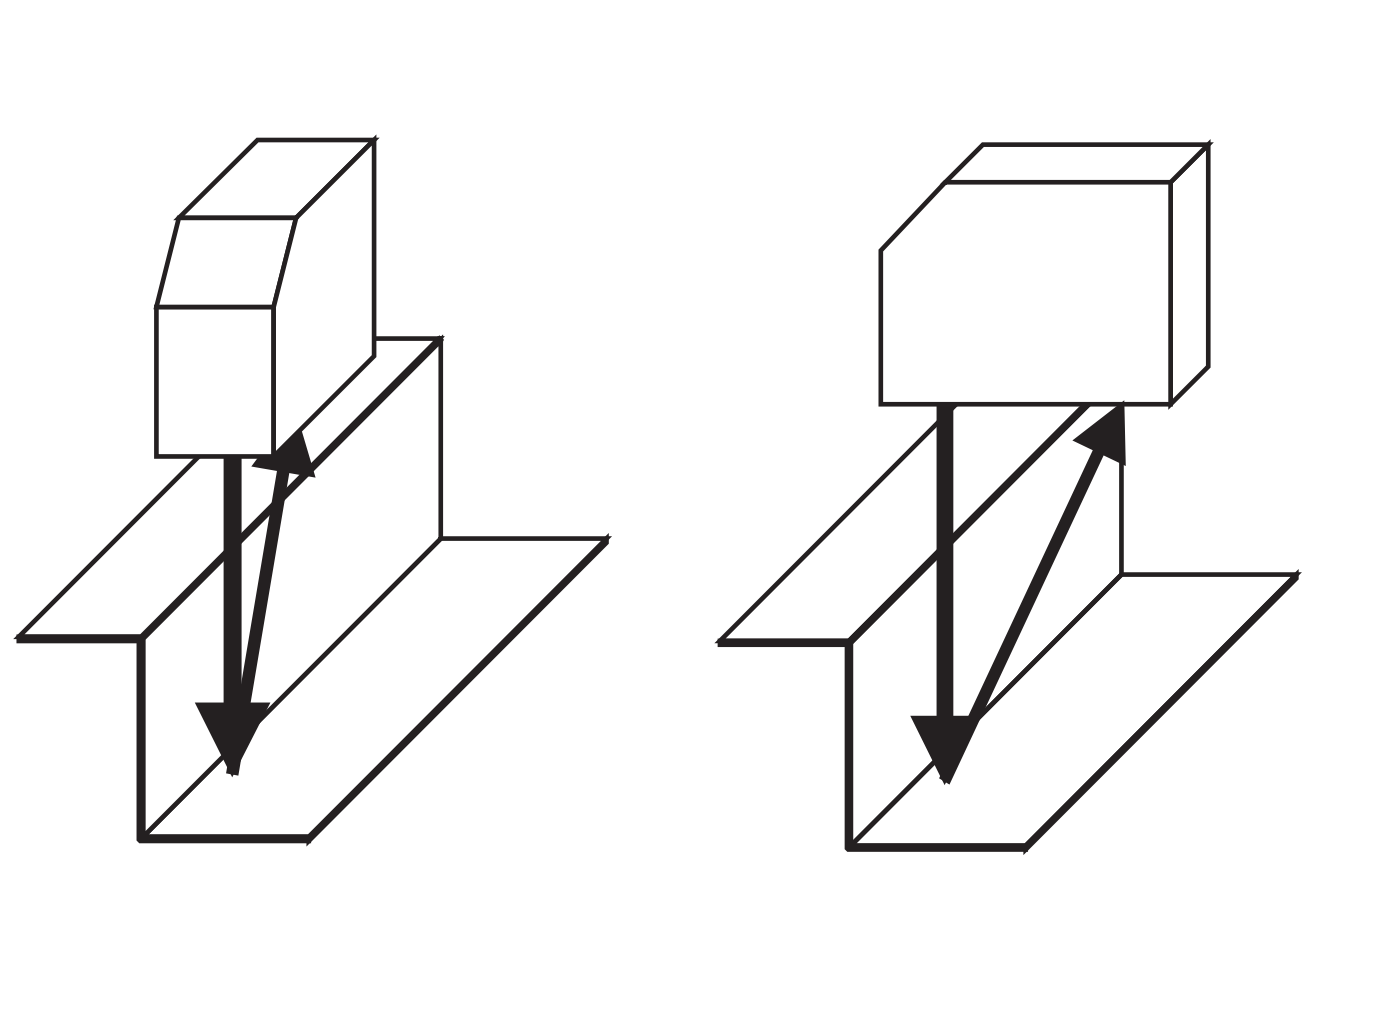
The Baumer OADM SA35 has a 16mm – 120mm range with a 4 – 20 mA analog current output and 0.12mm resolution. The sensing range is programmable and with smaller sensing windows the resolution can reach 2 microns. This project will utilize the maximum sensing range.
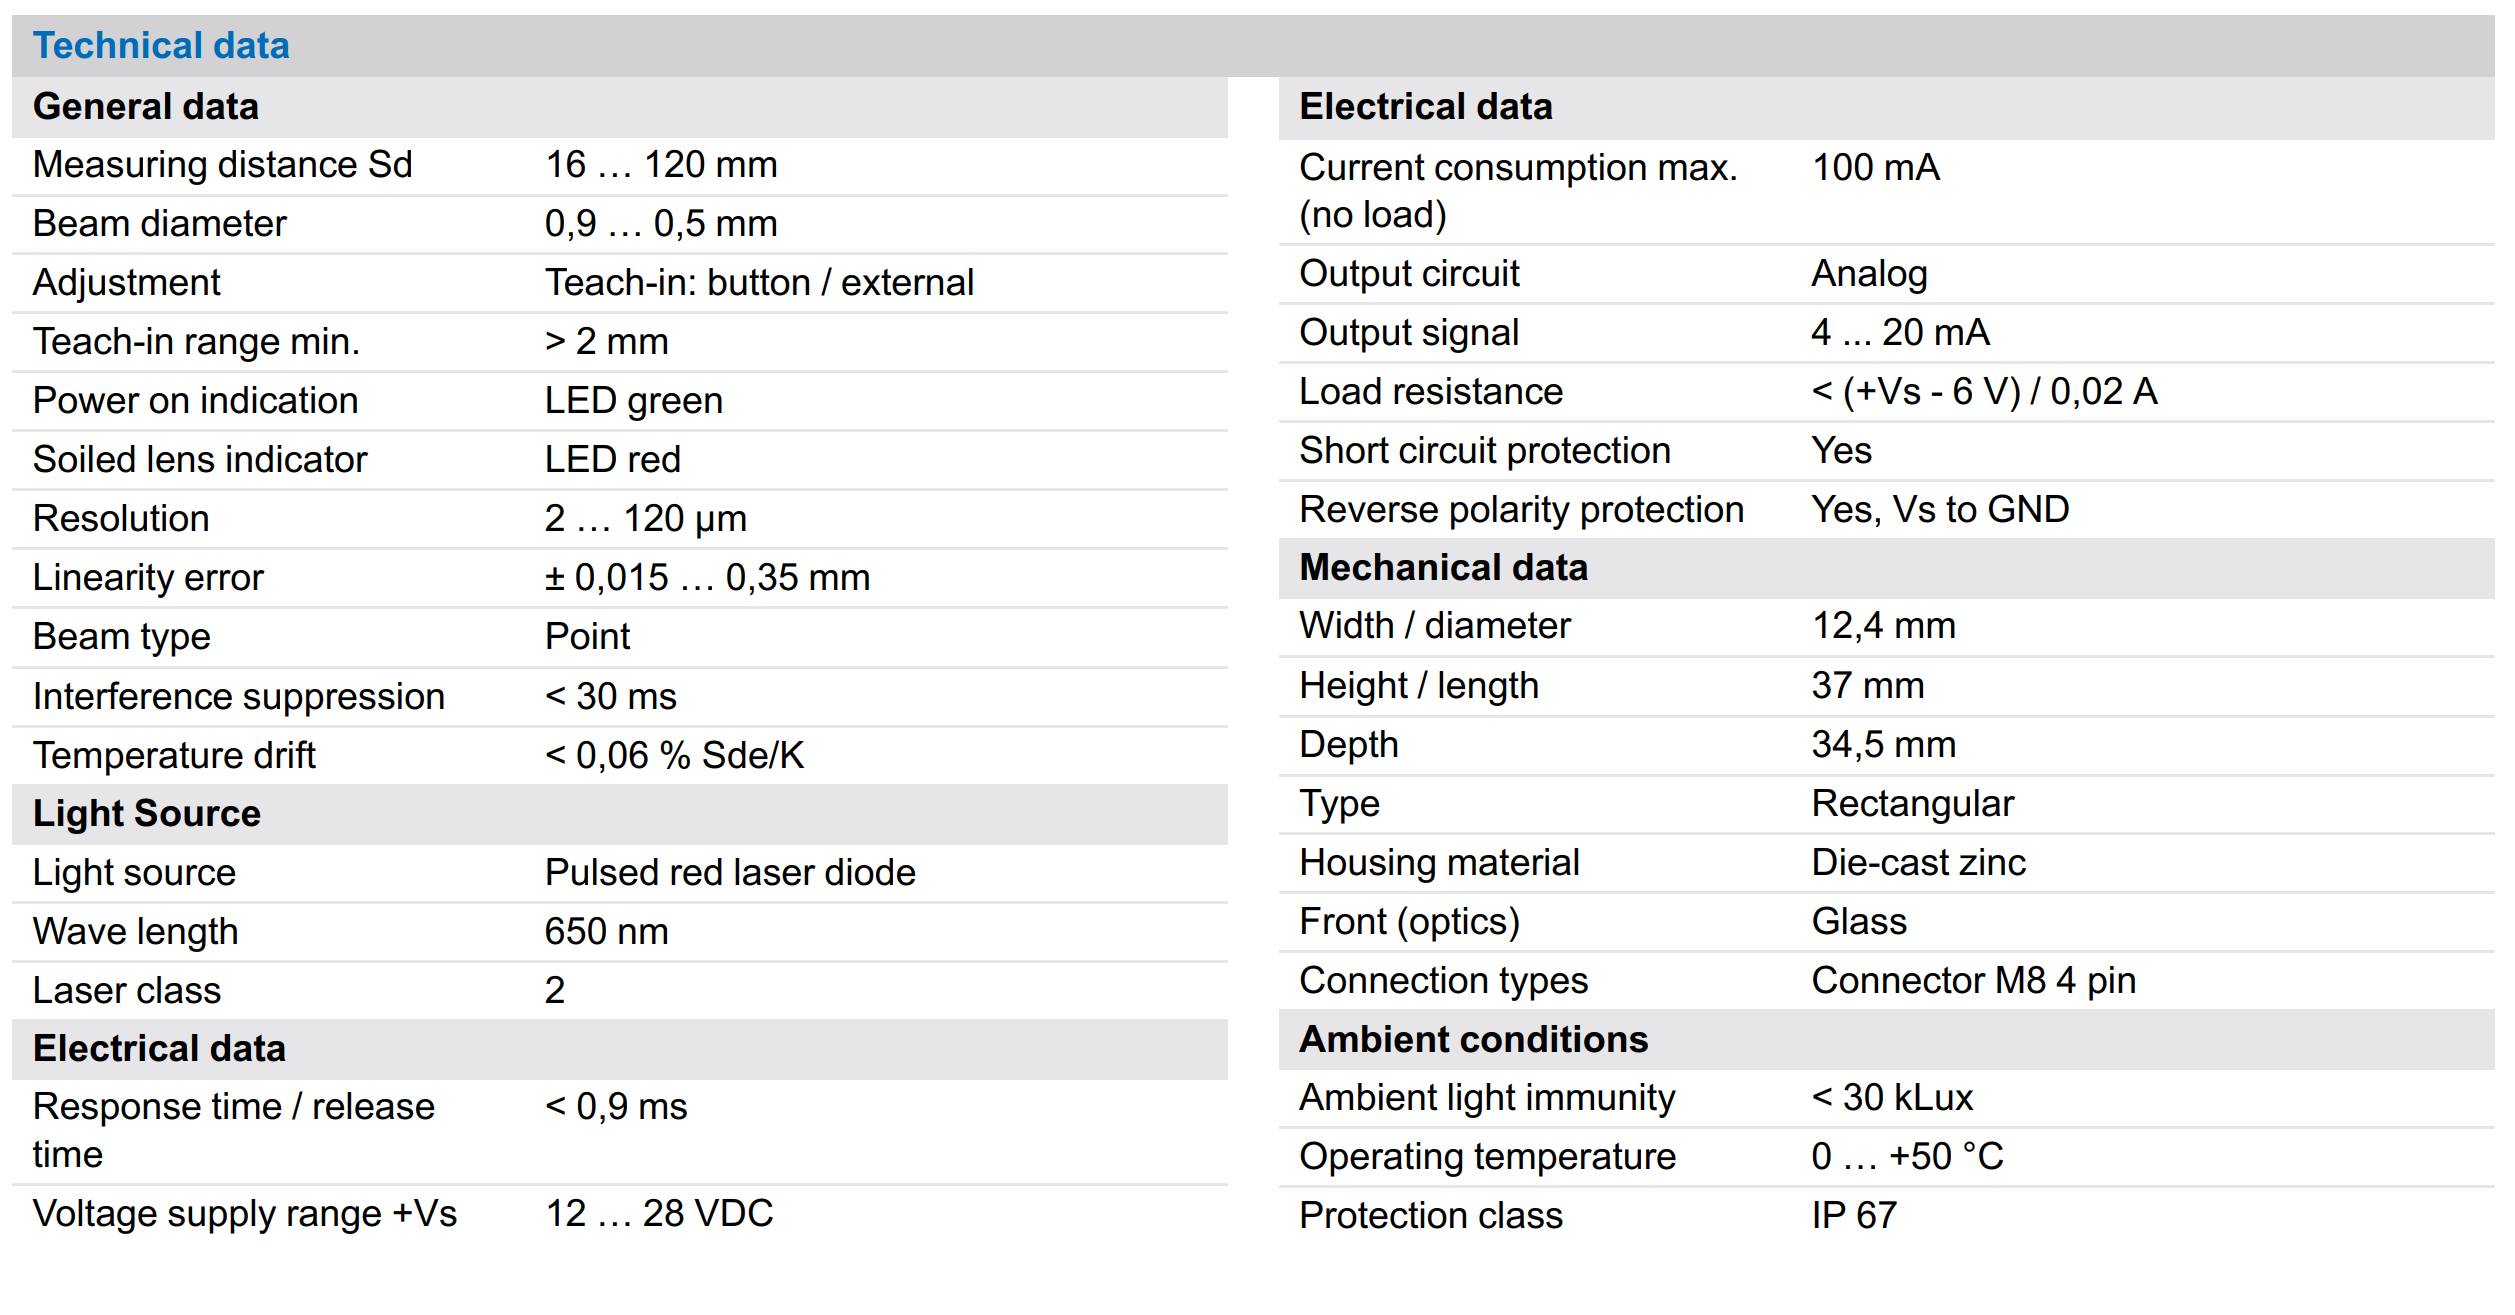
A word of caution when shopping for these sensors, always check the datasheet and understand what the sensor output is. Some sensors require a separate controller unit and/or possibly programming software that may not be available to a hobbyist buying a second-hand product.
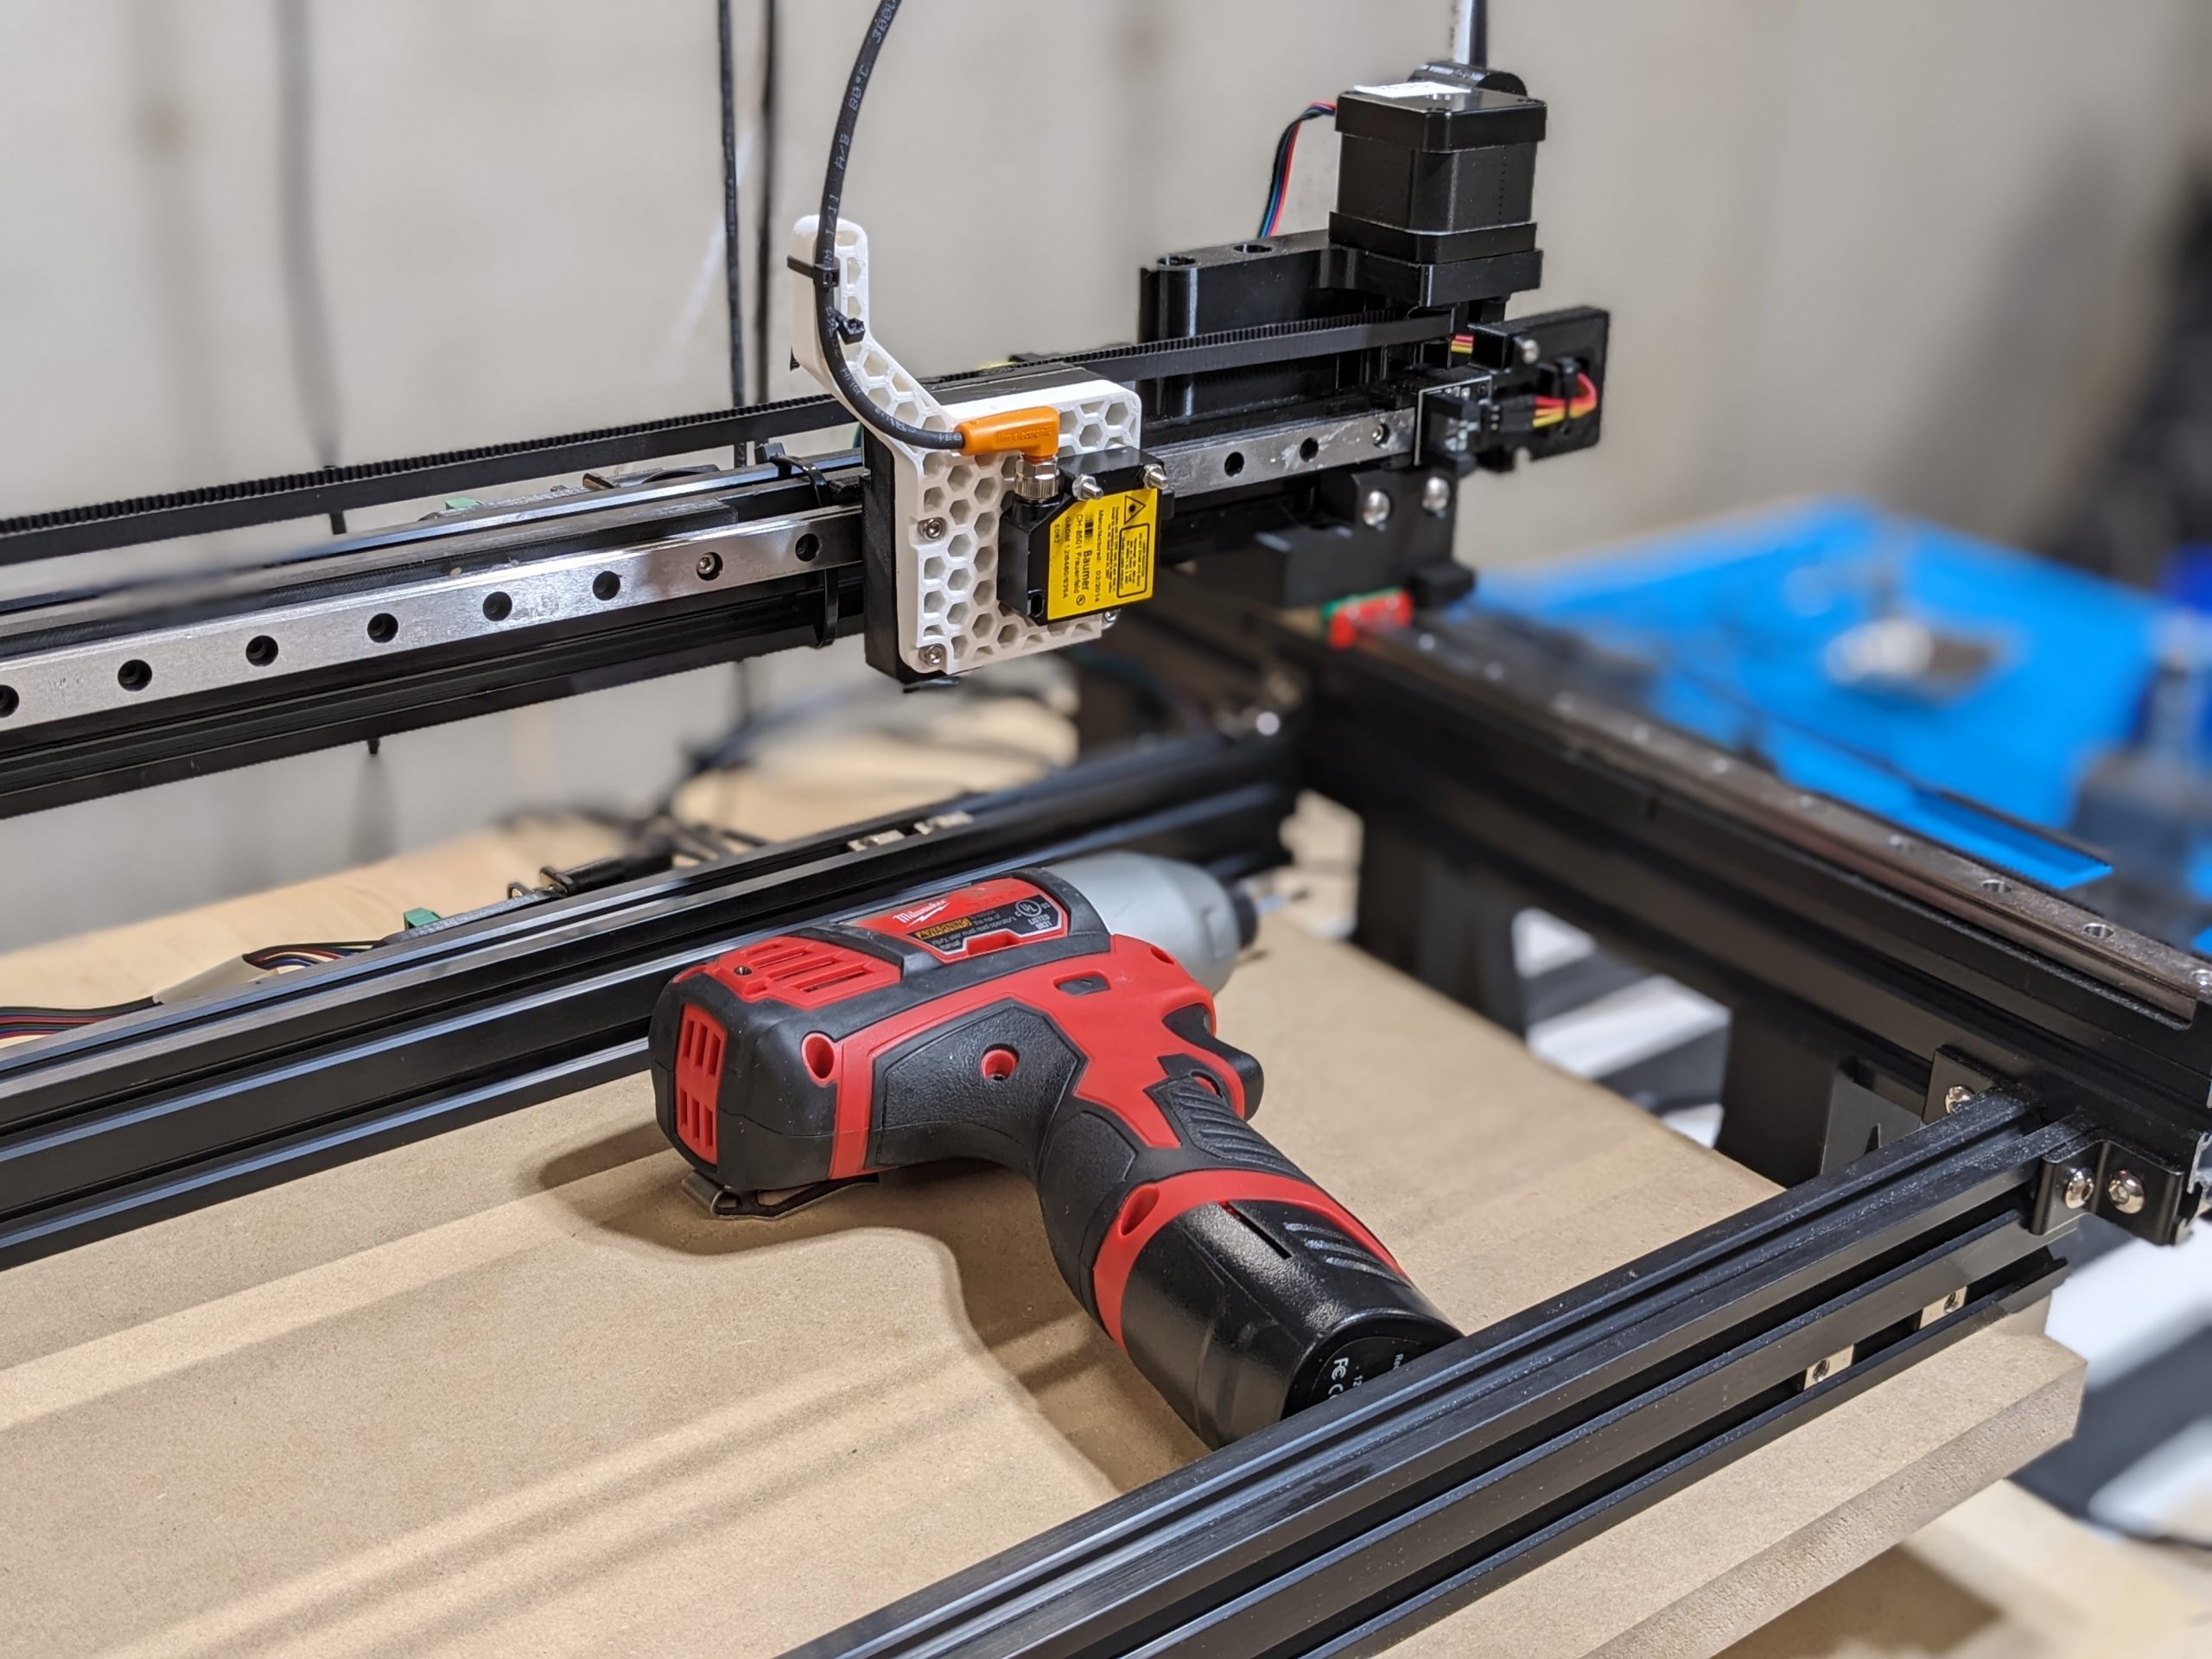
I was able to pair the sensor with a XY cartesian positioning system I had built earlier. The mechanical and electrical integration were straightforward. Mechanically the sensor required a new bracket to mount onto the positioning gantry. I was pleased with the integrated strain relief.


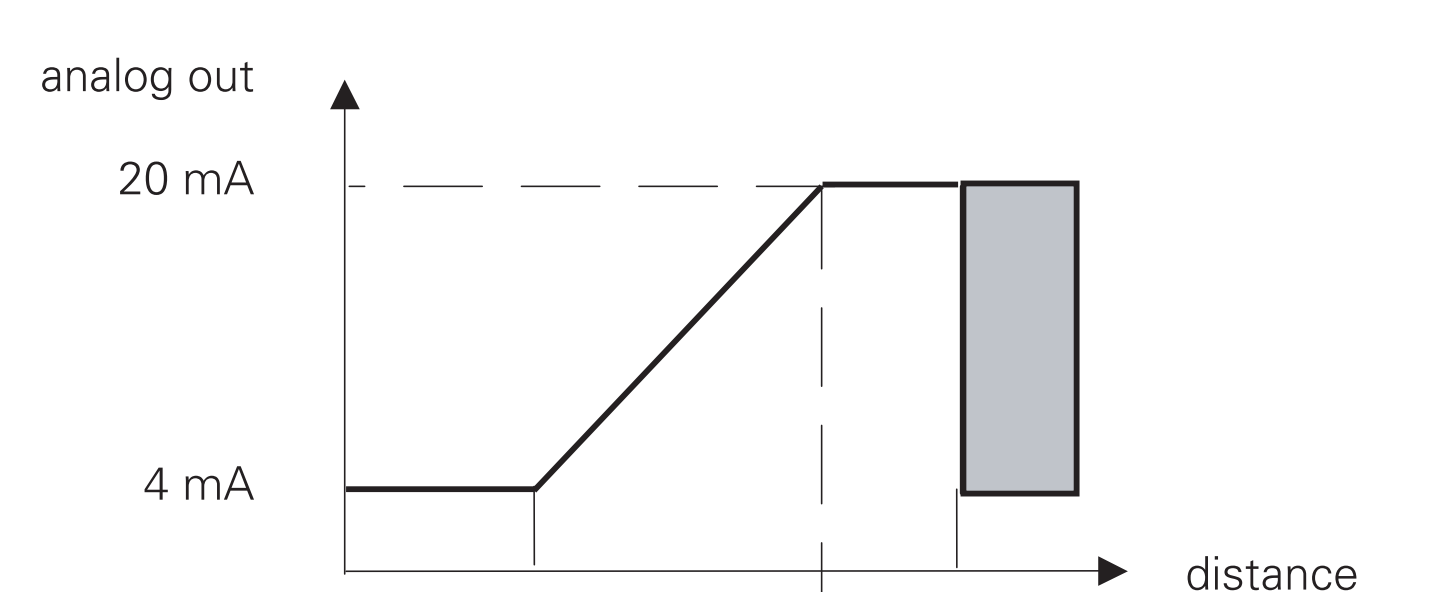
Electrically I needed to size a resistor to achieve the correct voltage drop (3.3v) for the controller (Teensy 4.1). The controller measures the voltage on the high side of the resistor and as the sensor current changes so will the measured voltage. The resistor scales the maximum sensor output (20mA) to the maximum allowable input voltage of the Teensy.
Writing the software to integrate everything was the fun part. I reused some Processing HMI code from an earlier project to control everything from a PC. The Teensy and PC communicate via a serial connection. At a high level the PC commands the Teensy to move to a position and provide a measurement. The Teensy uses state logic and handles the XY motion, measurement, and some filtering. When the Teensy returns a value the PC will respond with a new position. All of the calibration and unit scaling occurs on the PC.
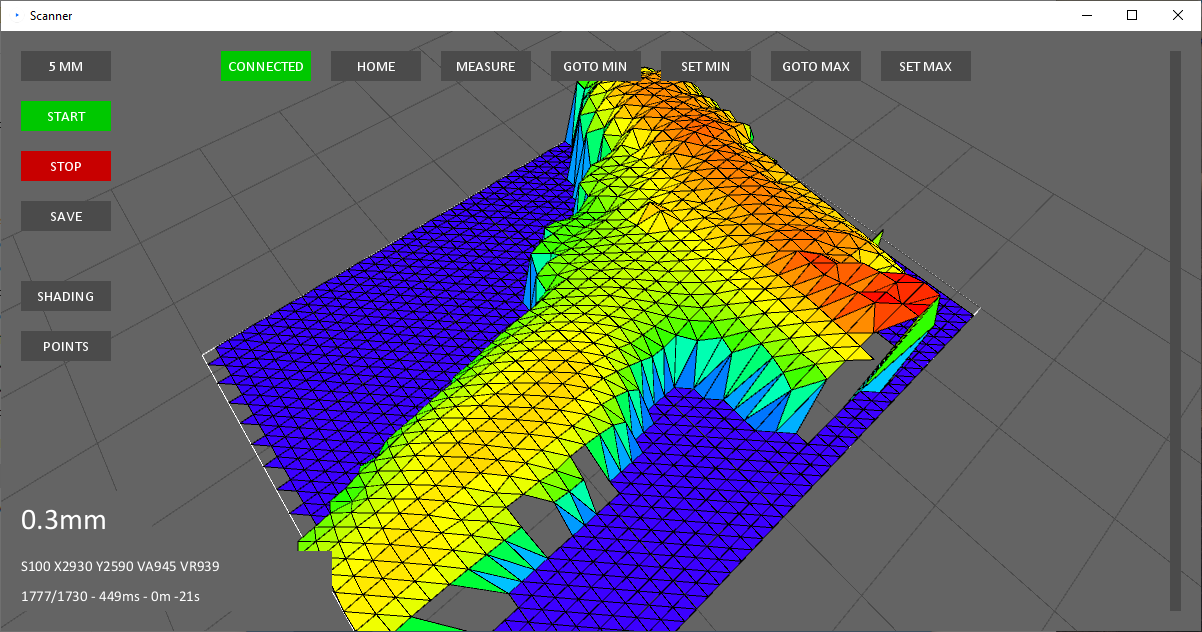
I started off with testing some simple line scans before moving onto a full 2D scan. Initially I was working with a point cloud but I found a simple way to mesh the points into a surface. Color grading the mesh based on height created a nice height map. I’m performing some filtering to throw out bad sensor values, hence some gaps in the scan mesh. The triangulation based sensor struggles on curved surfaces and in areas where the sensor cannot see the laser.
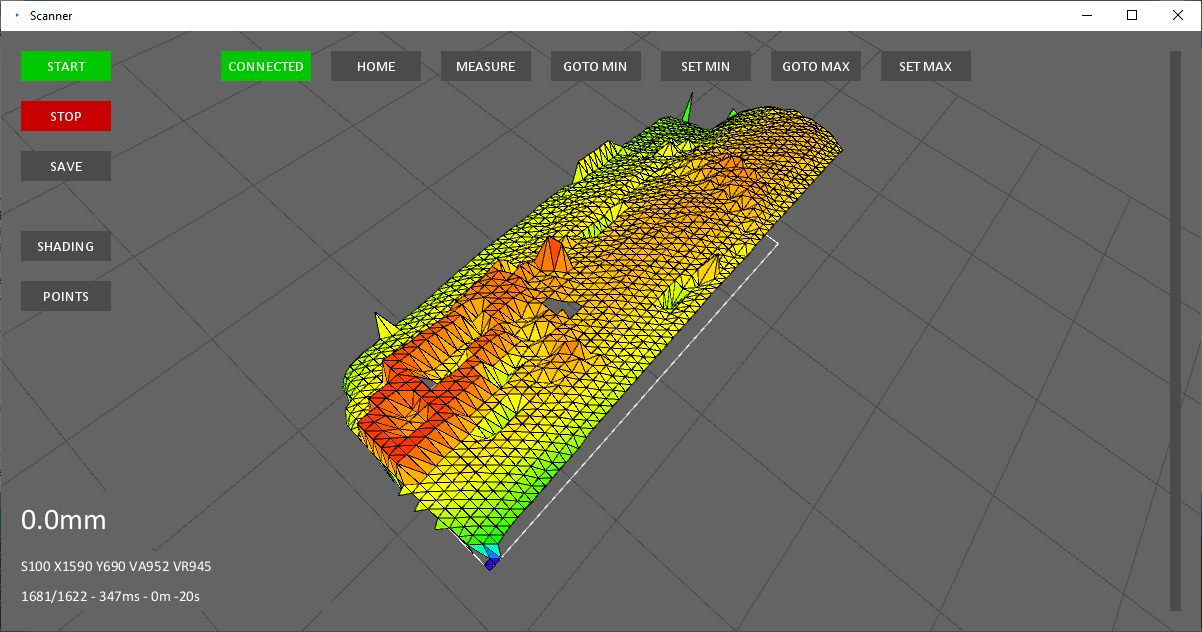
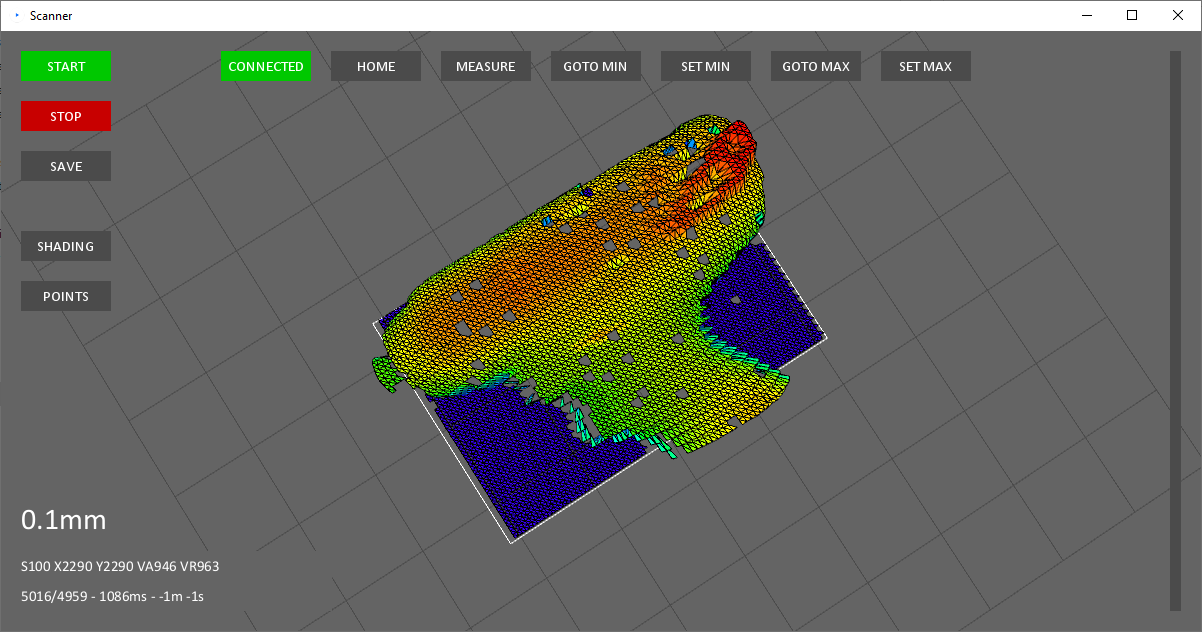
I’m using the Toxiclibs libraries for handling the mesh so it’s easy to export a STL of the scan
I’m pleased with the results of the build but I think the end product doesn’t have a lot of practicality. My initial concept was feasible but a top-down 2D scanner seems limited in application.
Pros
Inexpensive high performance sensor
Dimensionally accurate scans
Simple sensor integration and processing
Cons
Limited to simple 2D “top-down” scans
Laser spot size limits XY resolution
Distance resolution limited by analog output
Poor performance on curved surfaces
Overall I’m happy with this project even if the results were mixed. I believe this was a novel project – I haven’t seen anyone else attempt a 3D scanner like this in the hobbyist maker space.