
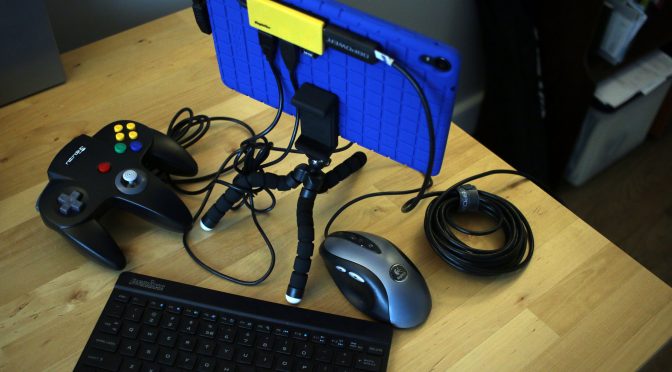
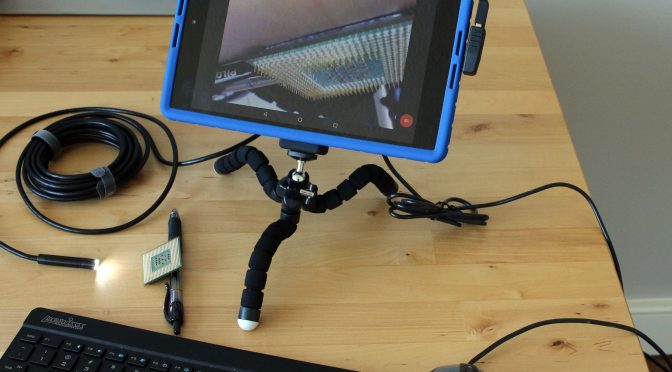
Android has a little known feature that provides built-in support for USB hardware devices. Provided you have the right adapter, you can plug in a keyboard, mouse, gaming controller, or USB drive and it will just work. This is due to a USB specification called USB On-The-Go (OTG) and it’s an amazing piece of functionality. My Frankenstein tablet project generated a lot of interest for OTG with Android and I wanted to explore the idea further. […]
Gadgets / Projects
Posted on:
Building a Frankenstein Tablet
Lately I have been fascinated with Android’s built-in support for USB hardware devices. Provided you have the right adapter, you can plug in a keyboard, mouse, gaming controller, or USB drive and it will just work. This is due to a USB specification called USB On-The-Go (OTG) and it’s pretty amazing. I had an older Nexus 9 tablet laying around and I wanted to see if I could extend its functionality with some bolt-on upgrades. This […]
Gadgets / Software
Posted on:
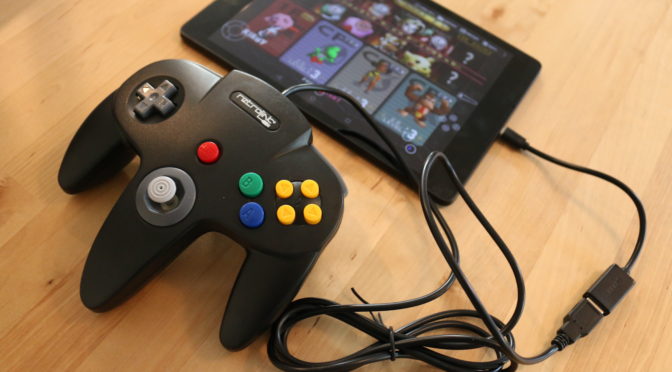
N64 on Android
It’s possible to play N64 games on any Android device. In fact it’s easy. It’s made possible by the magic of Android N64 emulation and Android’s extensive USB support that works with USB controllers. To make it happen you’ll need: USB N64 controller USB adapter dongle N64 emulation app Your favorite N64 ROMs It’s as easy as plugging in some cables. I had to remap my controller buttons in the emulator to get started. You can […]

Gadgets / Software
Posted on:
List of Tomato Compatible Routers
This is a comprehensive list of routers that are compatible with Tomato firmware. The two active communities supporting continuing work on Tomato firmware are Tomato by Shibby and AdvancedTomato. Both are great and have passionate developers contributing to each mod. I recently upgraded my router and I found it difficult to find a good router that was readily available, compatible with Tomato, and had the features I needed. I decided to make a list of all of […]

Gadgets / Projects
Posted on:
Dollar Bill Macro Photography
Check out these amazing macro shots of US currency. The patterned security features and microprinting are impressive.
Gadgets / Software / Solidworks
Posted on:
Solidworks in 4K
I was recently awarded with a pair of 4K Acer B286HK monitors at work for my Solidworks workstation. I was told there was an ordering mix up and they couldn’t be returned. Not sure if that was the complete story but I was not going to complain. Right off the bat, Solidworks looks great in 4K. Assemblies look crisp and detailed, drawings appear sharp with annotations and dimensions crystal clear. It took a few days to adjust […]
Gadgets
Posted on:
Acoustic Camera
This is a neat gadget that’s like an acoustic version of FLIR. Technology like this is becoming more important as consumer products and stringent safety regulations are requiring more acoustic analysis. This could be very useful to quickly locate and troubleshoot annoying rattles in an industrial plant. Manufacturer page here